Facebook OAuth2.0 access for web application
Facebook is very popular social network with millions of users worldwide and the number of active Facebook users growing day by day. Their platform allows third party websites to use Facebook as registration or login option with just a few clicks. That is the social login and it allows customers to bring their existing social identities and use them to register and log in without creating a new account explicitly. It saves a lot of time for users and makes the life easier as we don't need to remember all those credentials for different websites anymore.
Prerequisites
Facebook is very popular sign in option but it's still an option. There are many alternatives and all of them can work together. We recommend you to read about OAuth 2.0 protocol and how it works. We have a detailed post about it here: understanding OAuth 2.0 and how it works.
You will need a Facebook developer account to generate a client id and a client secret. If you don't have an account at Meta for Developers, create it from here: Meta for Developers.
Configuring Meta for Developers
Go to Facebook Developer and log in using your Facebook credentials.
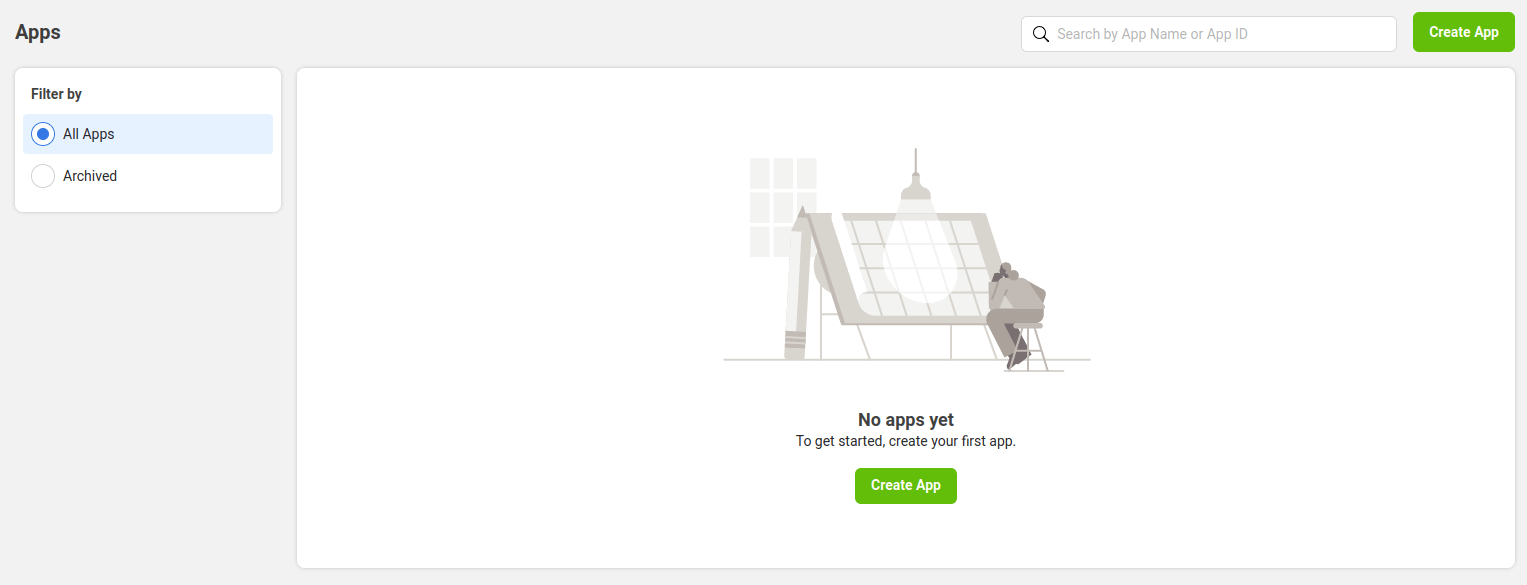
If you just registered your developer account or you don't have a created application, above screen will be shown.
Credentials
Click on the Create App button to begin the process.
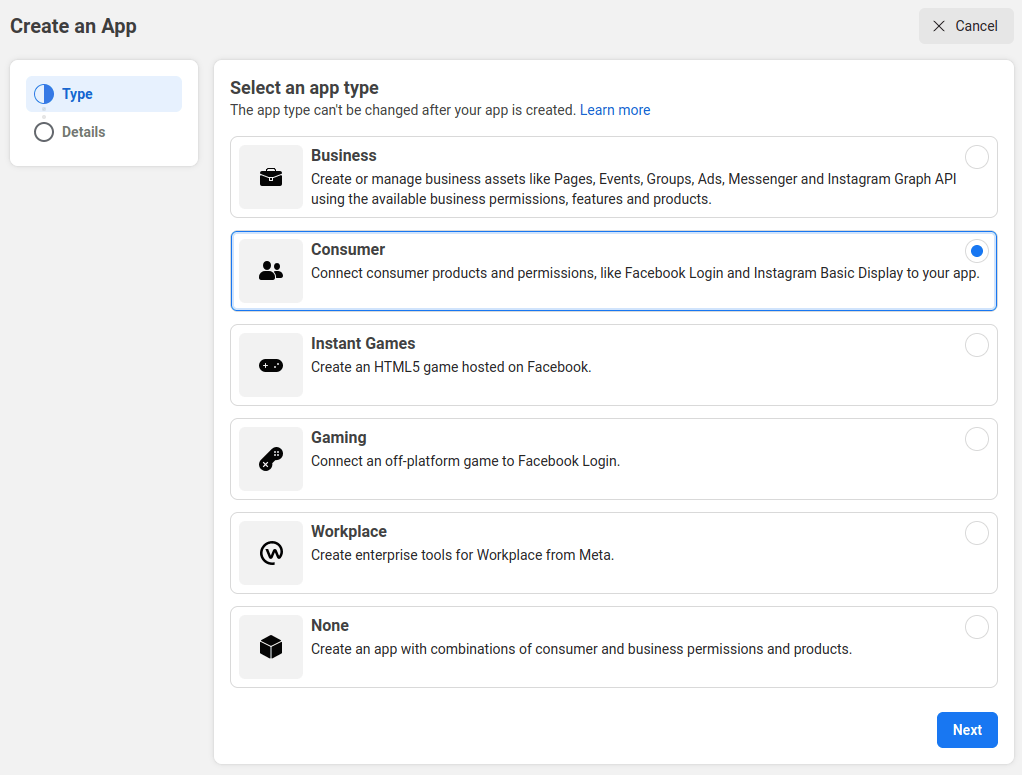
Facebook offers different application types. Consumer one fits best for website applications. Choose the correct type for you and click next to fill a simple form with your application details.
After successful registration of your application you will be redirected to the dashboard as displayed in the screen below.
Before you continue, we recommend to complete your application setup. Navigate to basic settings from the side menu and provide as much information as possible about your application:

Just as an additional information, application OAuth credentials are located on the top of this section (App ID and App Secret). Save them in a secure place and don't share with anyone.
Facebook login product
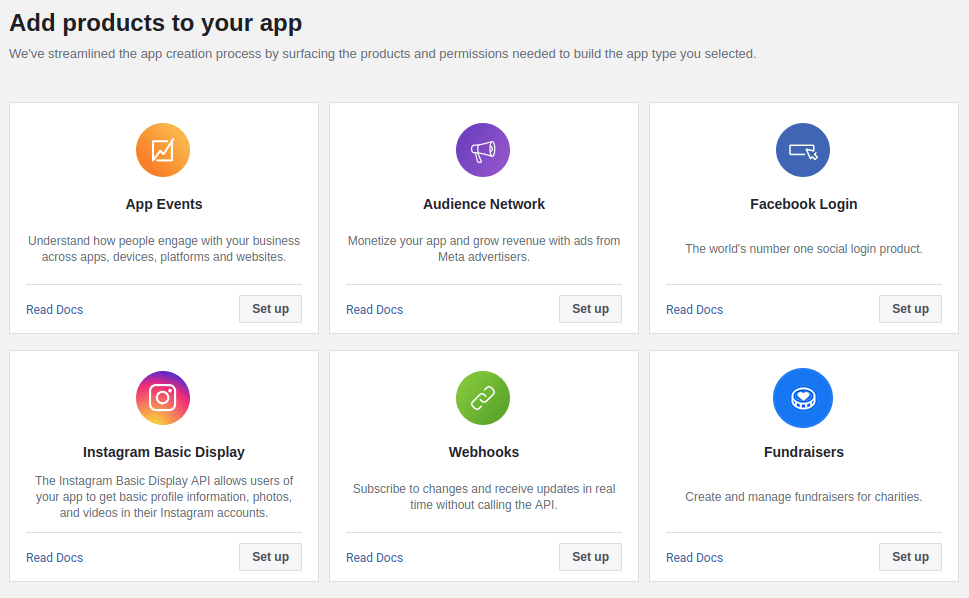
Return to the dashboard view and select Facebook Login product to continue the social login setup.
Facebook offers guided setup instructions for different application types.
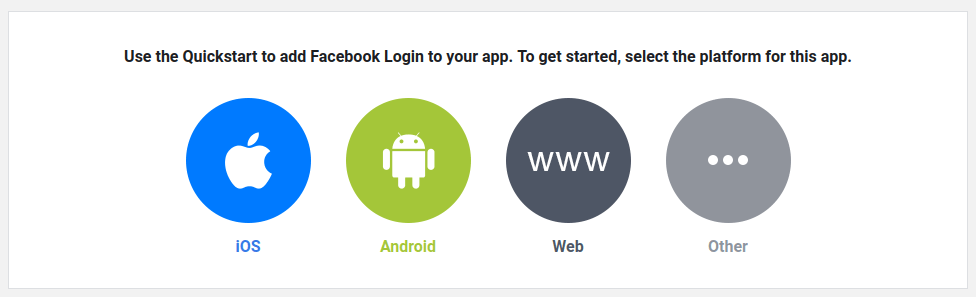
For web applications they provide an official Facebook SDK for JavaScript. It can be found within the Web category shown above.
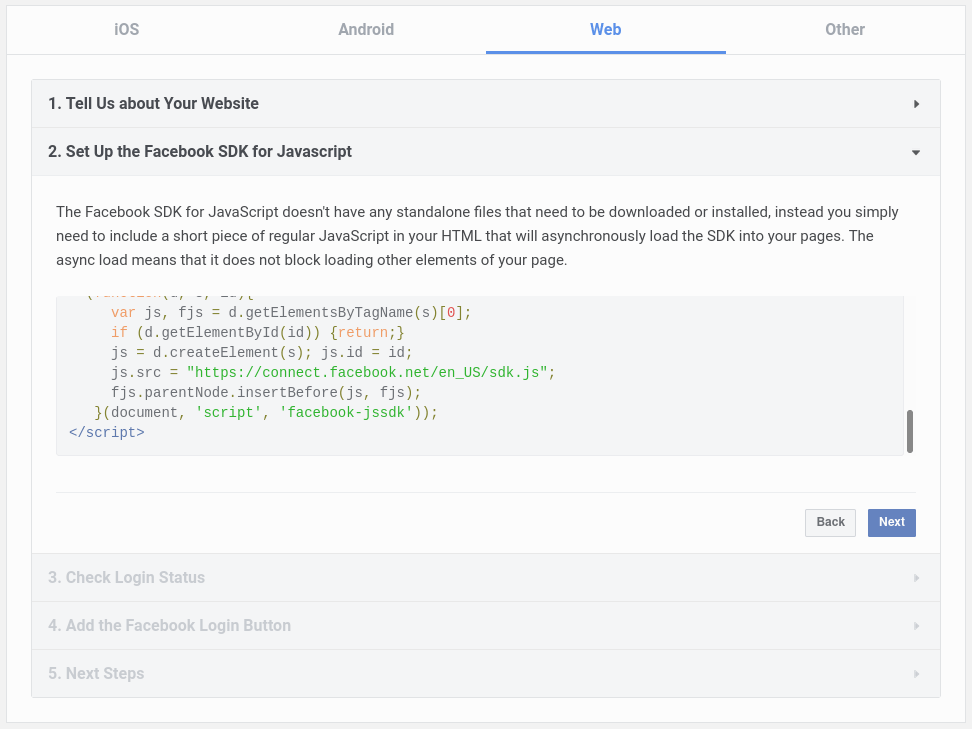
For more detailed information about JavaScript SDK integration use the official documentation. Alternatively, you can build a Login flow manually. This is for cases where you have an app that does not use Facebook SDKs, such as native desktop apps, server-side apps, or browsers that don't support JavaScript. We are going to cover it and explain the internal process later in this article.
Permissions and features
To avoid showing users an error message when they try to login using Facebook you must configure the scopes of your application in App Review section. Navigate to Permissions and Features and select the needed scopes clicking the buttons available next to description (i.e. get advanced access or request advanced access).

Apps may ask for the following two permissions from any person without submitting for review by Facebook:
public profile
email
For sign in purpose these permissions are more than enough. To ask for any other permission, your app will need to be reviewed by Facebook before them become visible in the Login Dialog to the public who're logging into your app with Facebook.
Configuring your application
Your application must have that consent before it can execute a Facebook API request that requires user authorization. The list below quickly summarizes these steps:
Your application identifies the permissions it needs.
Your application redirects the user to Facebook along with the list of requested permissions.
The user decides whether to grant the permissions to your application.
Your application finds out what the user decided.
If the user granted the requested permissions, your application retrieves tokens needed to make API requests on the user's behalf.
Set authorization parameters
Your first step is to create the authorization request. That request sets parameters that identify your application and define the permissions that the user will be asked to grant to your application.
Facebook's OAuth 2.0 endpoint is at:
https://www.facebook.com/v13.0/dialog/oauth
This endpoint has the following required parameters:
Name | Type | Description |
client_id | Required | The ID of your app, found in your app's dashboard. |
redirect_uri | Required | The URL that you want to redirect the person logging in back to. This URL will capture the response from the Login Dialog. The value must exactly match one of the authorized redirect URIs for the OAuth 2.0 client, which you configured in your Facebook login settings page. |
state | Recommended | A string value created by your app to maintain state between the request and callback. This parameter should be used for preventing Cross-site Request Forgery and will be passed back to you, unchanged, in your redirect URI. |
response_type | Optional | Determines whether the response data included when the redirect back to the app occurs is in URL parameters or fragments. This can be one of: code, token, code%20token and granted_scopes |
scope | Optional | A comma or space separated list of Permissions to request from the person using your app. |
Redirect to Facebook's OAuth 2.0 server
Redirect the user to Facebook's OAuth 2.0 server to initiate the authentication and authorization process. Facebook's OAuth 2.0 server authenticates the user and obtains consent from the user for your application to access the requested scopes. At this point in the login flow, the person will see the Login dialog and will have a choice of whether to cancel or to let the app access their data.
The user can then consent to grant access to one or more scopes requested by your application or refuse the request. The response is sent back to your application using the redirect URL you specified.
Handle the OAuth 2.0 server response
Because this redirect flow involves browsers being redirected to URLs in your app from the Login dialog, traffic could directly access this URL with made-up fragments or parameters. If your app assumed these were valid parameters, the made-up data would be used by your app for potentially malicious purposes. As a result, your app should confirm that the person using the app is the same person that you have response data for before generating an access token for them. Confirming identity is accomplished in different ways depending on the response_type received above:
When code is received, it has to be exchanged for an access token using an endpoint. The call will need to be server-to-server, since it involves your app secret.
When token is received, it needs to be verified. You should make an API call to an inspection endpoint that will indicate who the token was generated for and by which app. As this API call requires using an app access token, never make this call from a client. Instead make this call from a server where you can securely store your app secret.
When code and token are both received, both steps should be performed.
Note: you can also generate your own state parameter and use it with your login request to provide CSRF protection.
Exchange authorization code for tokens
After the web server receives the authorization code, it can exchange the authorization code for an access token. To get an access token, make an HTTP GET request to the following OAuth endpoint:
https://graph.facebook.com/v13.0/oauth/access_token
and set the following parameters:
Name | Description |
client_id | Your app's ID. |
client_secret | Your unique app secret, shown on the App Dashboard. |
code | The parameter received from the Login Dialog redirect above. |
redirect_uri | This argument is required and must be the same as the original request_uri that you used when starting the OAuth login process. |
Facebook responds to this request by returning a JSON object:
Name | Description |
access_token | The token that your application sends to authorize a Facebook API request. |
expires_in | The remaining lifetime of the access token in seconds. |
token_type | The type of token returned. At this time, this field's value is always set to Bearer. |
In case of fail, you will receive an explanatory error message.
Calling Facebook APIs
After your application obtains an access token, you can use the token to make calls to a Facebook API on behalf of a given user account if the scope(s) of access required by the API have been granted. To do this, include the access token in a request to the API by including either an access_token query parameter.
You can try out Facebook APIs at the Graph API Explorer.
Conclusion
We've learned how the complete OAuth 2.0 flow works with Facebook. There is a large variety of permissions and endpoints provided by Facebook to make requests on behalf of a given user. Everything depend on your applications and it needs.

0 Comments