circuit


Pressure and temperature measurement with GY-68

  • avatar
  • 5.6K Views
  • 6 mins read
Preview post image

The GY-68 module, also known as the BMP180 module, is a popular sensor module used for measuring atmospheric pressure, temperature, and altitude. It features a highly precise digital barometric pressure sensor that can be easily integrated with an Arduino board. In this tutorial, we will guide you through the process of connecting the GY-68 module to an Arduino, enabling you to gather accurate environmental data for your projects. So, let's get started!

How to use potentiometer with Arduino

  • avatar
  • 6.1K Views
  • 3 Likes
  • 4 mins read
Preview post image

A potentiometer is a simple knob that provides a variable resistance, which we can read into the Arduino board as an analog value. They can be attuned from zero ohms to whatever maximum resistance that is specific to it. For example, a potentiometer of 10 kΩ can be adjusted from 0 Ω to its maximum of 10 kΩ.

Interfacing laser diode module with Arduino

  • avatar
  • 4.9K Views
  • 1 Like
  • 4 mins read
Preview post image

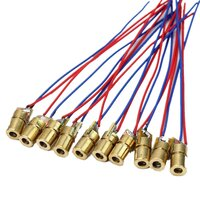
Laser modules emit highly focused beams of light, making them ideal for a wide range of applications. One of the key aspects of a laser module is its power output, typically measured in milliwatts (mW). Arduino compatible laser modules typically have a power output within the lower range ensuring safety and compatibility with the microcontroller board. It's important to note that modules require safety precautions due to their increased risk of eye damage and potential fire hazards for higher-power lasers.

 Join Our Monthly Newsletter

Get the latest news and popular articles to your inbox every month

We never send SPAM nor unsolicited emails

The essential guide to resistors

  • avatar
  • 4.8K Views
  • 5 mins read
Preview post image

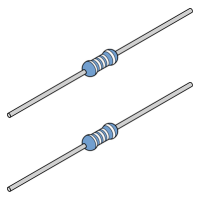
Ever wondered how your phone manages to stay charged without blowing up or how your TV remote controls those watching marathons? It's all thanks to a tiny but mighty electronic component - the resistor. Resistors are one of the most valuable parts of the tech world. These little wizards quietly control the flow of electric current in ways that make our gadgets tick. In this article, we're taking a deep dive into the world of resistors, from the magic of Ohm's law to cracking the colorful code that reveals their hidden values.

Transistors: the building blocks of our digital world

  • avatar
  • 3.5K Views
  • 1 Like
  • 7 mins read
Preview post image

Transistors are semiconductor devices that regulate the flow of electrical current within a circuit. Their invention in the mid-20th century marked a pivotal moment in electronics. Semiconductors, typically made of silicon or germanium, form the basis of transistors, granting them the ability to switch and amplify electrical signals. These devices have revolutionized the world of electronics, making way for the digital age by enabling the miniaturization of complex circuits and facilitating the rapid advancement of technology.

Using push buttons with Arduino

  • avatar
  • 4.0K Views
  • 2 Likes
  • 4 mins read
Preview post image

Today we are going to speak about push buttons, the wiring and how to implement the code for this circuit elements in Arduino. Push buttons connect two points in a circuit when you press them. That means that logic state of the circuit change when you press and keep pressed the button.

Connecting a motor to Arduino

  • avatar
  • 3.4K Views
  • 1 Like
  • 7 mins read
Preview post image

Arduino microcontrollers are the heart of countless DIY projects, from robots to automated systems. To bring these projects to life, you often need to interface them with motors. In this guide, we'll walk you through the essential steps of connecting a motor to an Arduino using a separate power supply while ensuring control with precision using an NPN transistor. This approach allows you to harness the full potential of your motorized creations without overloading your Arduino.

Controlling a LED with Arduino

  • avatar
  • 3.3K Views
  • 6 mins read
Preview post image

Light Emitting Diodes (LEDs) are incredibly adaptable components often employed in electronics projects for various purposes, from indicating status to creating captivating lighting effects. When it comes to managing LEDs with an Arduino, you have the option of utilizing either digital pins or Pulse Width Modulation (PWM) pins. In this article, we'll explore the advantages of each method and provide you with a comprehensive guide on how to control LEDs using an Arduino.

Controlling fan speed with Arduino using a potentiometer

  • avatar
  • 2.8K Views
  • 3 Likes
  • 5 mins read
Preview post image

Adjusting a fan's speed using an Arduino is a great way to learn about PWM (Pulse Width Modulation) and motor control. With just a potentiometer and some simple wiring, you can create a smooth, manual speed adjustment system. This setup is useful for cooling electronics, ventilation projects, or any application where adjustable airflow is needed.

Pressure and temperature measurement with GY-65

  • avatar
  • 3.4K Views
  • 1 Like
  • 5 mins read
Preview post image

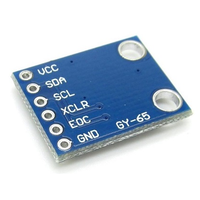
Precision monitoring of atmospheric conditions becomes a reality with the GY-65 module based on BMP085 sensor. Armed with the ability to measure temperature, pressure, and altitude, the GY-65 module opens up a world of possibilities for weather stations, altitude tracking devices, and other projects requiring accurate environmental data. In this article, we delve into the capabilities of the module, examining its features, connectivity with Arduino.