Serial communication between two Arduino boards

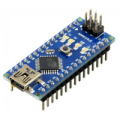
Getting two Arduino boards to talk to each other opens up projects that a single board can't handle on its own. You might have one board reading sensors in one corner of a room and another driving a display somewhere else, and the two need to share what they know. Serial communication is one of the simplest ways to make that happen, and it works with almost any Arduino model you have lying around. This article walks through connecting two Arduino Nano boards and passing data back and forth over their serial ports.
Components
How serial communication works
Serial communication sends data one bit at a time over a single wire, using a protocol called UART. Each board has a transmit line (TX) that pushes data out and a receive line (RX) that takes data in. The important part is the crossover: the TX of one board connects to the RX of the other, so what one sends is exactly what the other reads. Connect TX to TX and nothing useful comes through.
Two more things matter for this to work. Both boards need a shared ground, because the voltage levels that represent the bits only make sense against a common reference point. They also need to agree on the baud rate, which is the speed of the connection measured in bits per second. If one board talks at 9600 and the other listens at 115200, the bytes arrive as garbage.
Wiring schema
This article uses the Arduino Nano for all the pin names and wiring, though the same setup works on any other AVR board once you match the equivalent pins. The Nano has one hardware UART wired to pins D0 (RX) and D1 (TX). Those same pins run through the USB chip that uploads your sketches and powers the Serial Monitor. That creates a conflict, because using the hardware UART for the link between boards means losing the easy connection to your computer for uploading code and printing debug messages.
The usual way around this is the SoftwareSerial library, which turns a pair of ordinary digital pins into a second serial port in software. This keeps the hardware UART free for talking to the computer over USB while the two boards chat on separate pins. SoftwareSerial has a couple of limits worth knowing. It can only listen on one software port at a time, and very high baud rates get unreliable, so keeping the link at 9600 or 19200 is a safe choice for most projects.
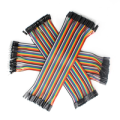
The examples that follow use two Arduino Nano boards, each with pin D2 as its receive line and pin D3 as its transmit line through SoftwareSerial. Connect them with the crossover in mind and tie the grounds together so both boards share the same reference.
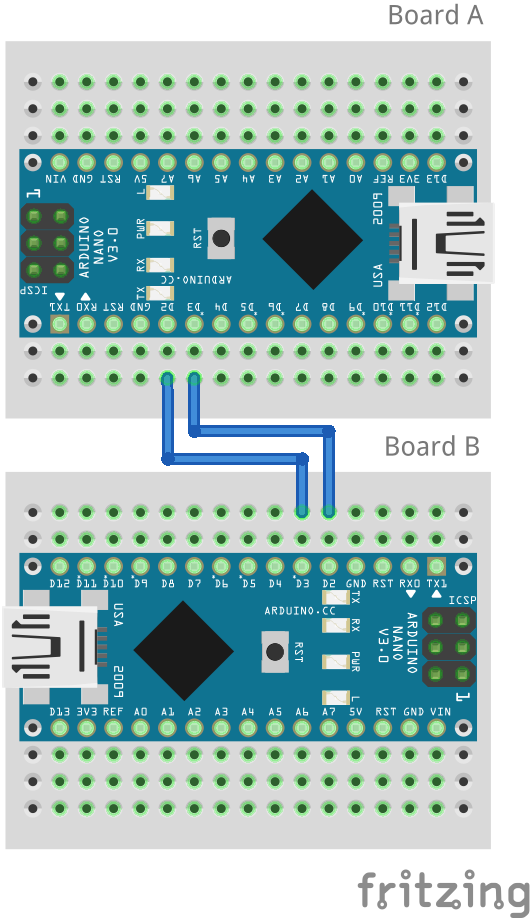 Both Nanos here run at 5V logic, so you can connect the pins directly with no extra parts. Power each board however suits your setup, from separate USB cables or from a shared supply, as long as the grounds stay connected.
One way communication
The first board sends a short message once a second. It uses SoftwareSerial for the link to the second board and the regular Serial object to print a local confirmation to the Serial Monitor over USB.
#include <SoftwareSerial.h>

SoftwareSerial otherBoard(2, 3); // RX, TX pins for the board to board link

void setup()
{
  Serial.begin(9600); // USB connection for debug messages
  otherBoard.begin(9600); // link to the second board
}

void loop()
{
  otherBoard.println("Hello from board A"); // send one line to the other board
  Serial.println("Message sent");           // confirm locally on the monitor
  delay(1000);                              // wait a second before sending again
}
The println call adds a newline character to the end of every message. That newline is not only for looks, it gives the receiving board a clear marker for where one message stops and the next begins, which makes reading full lines on the other side much easier.
The second board watches its software serial port for incoming characters and reads a full line each time one arrives. It then forwards that line to the Serial Monitor so you can see what came through.
#include <SoftwareSerial.h>

SoftwareSerial otherBoard(2, 3); // RX, TX pins for the board to board link

void setup()
{
  Serial.begin(9600); // USB connection for debug messages
  otherBoard.begin(9600); // link to the second board
}

void loop()
{
  // check if any data has arrived
  if (otherBoard.available()) {
    String message = otherBoard.readStringUntil('\\n'); // read up to the newline marker

    Serial.print("Received: ");
    Serial.println(message); // show the message on the monitor
  }
}
Upload the first sketch to board A and this one to board B, then open the Serial Monitor on the receiving board at 9600 baud. A new line should appear every second. If nothing shows up, the connection between TX and RX is usually crossed the wrong way, which is the first thing to recheck.
Bidirectional communication
Serial links are not limited to one direction. Each board can both send and receive, which lets you build a simple request and response pattern. In this example board A sends a ping and waits for board B to answer with a pong.
Board A sends the request and then checks for a reply:
#include <SoftwareSerial.h>

SoftwareSerial otherBoard(2, 3); // RX, TX

void setup()
{
  Serial.begin(9600);
  otherBoard.begin(9600);
}

void loop()
{
  otherBoard.println("ping"); // ask the other board for a response
  delay(500);

  // look for an answer
  if (otherBoard.available()) {
    String reply = otherBoard.readStringUntil('\\n');

    Serial.print("Reply received: ");
    Serial.println(reply);
  }

  delay(500);
}
Board B listens for the request and answers only when it recognises the keyword:
#include <SoftwareSerial.h>

SoftwareSerial otherBoard(2, 3); // RX, TX

void setup()
{
  Serial.begin(9600);
  otherBoard.begin(9600);
}

void loop()
{
  // wait for an incoming request
  if (otherBoard.available()) {
    String message = otherBoard.readStringUntil('\\n');

    // respond only to the expected keyword
    if (message == "ping") {
      otherBoard.println("pong"); // send the answer back
    }
  }
}
Checking the content of the message before replying keeps the two boards in step and stops them from reacting to noise or partial data on the line. From here you can swap the keywords for sensor readings, commands, or any other short piece of text your project needs to pass around.
Common problems and how to fix them
When a link refuses to work, the baud rate is the first suspect. Every begin call on both boards has to use the same number, and the Serial Monitor has to match it too. A single mismatched value turns readable text into strings of odd symbols, which is a strong hint that the speeds are out of sync.
The wiring causes most of the rest. A missing ground connection between the two boards stops the signal from making any sense, even when TX and RX look correctly placed. Swapped TX and RX lines produce silence with no error, so a quick swap is worth trying when nothing arrives. On longer runs or higher speeds, dropping the baud rate down a step often clears up scrambled characters, since SoftwareSerial gets less forgiving as the speed climbs.
Conclusion
Serial communication gives two Arduino boards a straightforward way to share information without much wiring or complicated code. Once the crossover between transmit and receive, the shared ground, and a matching baud rate all make sense, the same pattern scales from a quick two board test to larger setups with several devices passing messages around. With those basics in hand, you have a solid building block for splitting work across boards and growing your projects beyond what a single Arduino can manage on its own.
Credits
Official GitHub: https://github.com/hibit-dev/arduino-serial

This article is available to HiBit members only.
If you're new to HiBit, create a free account to read this article.




0 Comments