Interfacing laser diode module with Arduino
Laser modules emit highly focused beams of light, making them ideal for a wide range of applications. One of the key aspects of a laser module is its power output, typically measured in milliwatts (mW). Arduino compatible laser modules typically have a power output within the lower range ensuring safety and compatibility with the microcontroller board. It's important to note that modules require safety precautions due to their increased risk of eye damage and potential fire hazards for higher-power lasers.
Components
| 1x Arduino Nano (or another Arduino module)
|
| 1x Mini-breadboard
|
| 1x Laser diode $1.73 |
| Dupont wires
|


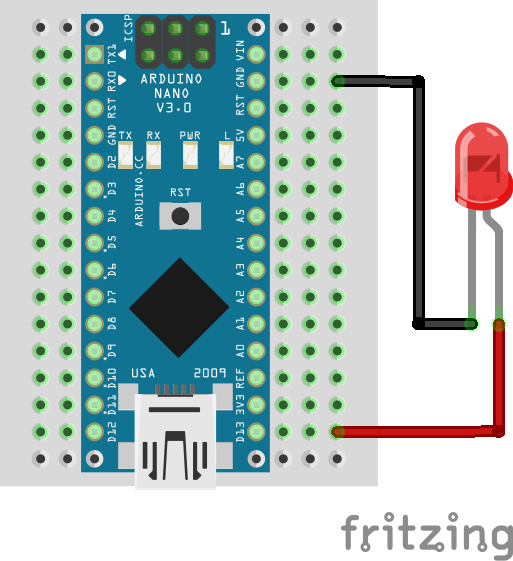
Wiring schema
Laser modules often come with a built-in driver circuit, simplifying the integration process. They typically have three input pins: VCC (power supply), GND (ground), and SIG (signal). The SIG pin allows to control the laser module, enabling users to turn it on and off or modulate its intensity based on project requirements. Other modules include only two pins: VCC (power supply) and GND (ground). In this scenario, VCC serves both as a power supply and a signal pin simultaneously.
Arduino code
In this code snippet, we begin by configuring Arduino pin 13 as an output to control the laser module. Subsequently, we alternate between turning the laser on and off every three seconds.
#define LASER_PIN 13

void setup()
{
  pinMode(LASER_PIN, OUTPUT);

  Serial.begin(115200);
}

void loop()
{
  Serial.println("Turning laser ON");
  digitalWrite(LASER_PIN, HIGH);
  delay(3000); // Wait three seconds

  Serial.println("Turning laser OFF");
  digitalWrite(LASER_PIN, LOW);
  delay(3000); // Wait three seconds
}
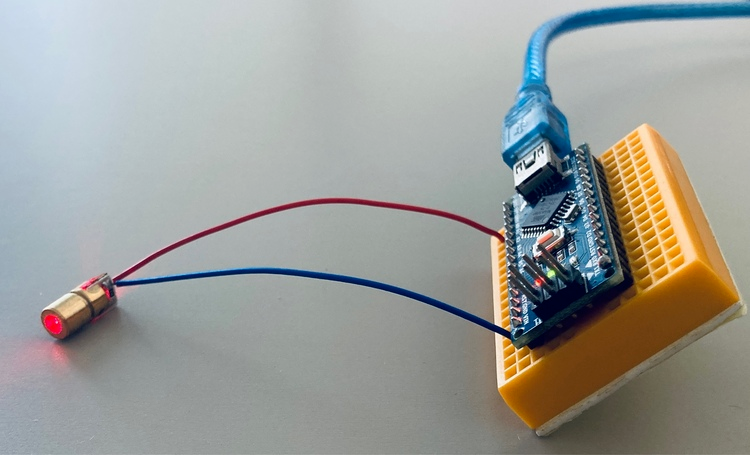
Testing
We can see that the laser behaved as expected by turning on during three seconds and then turning off. Since we used pin 13 for control, you can notice that the laser's status aligns with the behavior of the onboard Arduino LED.
Conclusion
With its compact size and easy integration, the laser module offers precise and controlled light emission for a variety of projects. As you embark on your journey with the laser module, always prioritize safety. Be cautious when working with laser modules, especially when dealing with higher power outputs, and follow proper safety guidelines to protect your eyes and prevent accidents.
Credits
Official GitHub: https://github.com/hibit-dev/laser-diode


0 Comments