MySQL 8 setup with remote connections
Setting up a MySQL 8 server can seem complicated at first, but with a clear and structured approach, the process becomes much more manageable. This guide explains how to install MySQL 8 on Debian-based systems, configure it to accept remote connections, and test that it is running correctly. The instructions are practical and direct, suitable for environments that require reliable and straightforward configuration.
System preparation before installation
Before starting the installation, make sure the system is updated. It's also useful to verify that no previous MySQL or MariaDB installations exist, as these can cause conflicts.
sudo apt update
sudo apt upgrade -y
To check for existing installations:
dpkg -l | grep -i mysql
dpkg -l | grep -i mariadb
If needed, remove existing packages:
sudo apt purge mysql* mariadb* -y
sudo apt autoremove -y
sudo apt autoclean
And clean up any old directories:
sudo rm -rf /etc/mysql /var/lib/mysql
This ensures a clean starting point for installing MySQL 8.
Installing MySQL 8 Server
MySQL 8 is available directly from the default APT repositories in most modern Debian and Ubuntu systems. The installation can be completed with a single command:
sudo apt install mysql-server -y
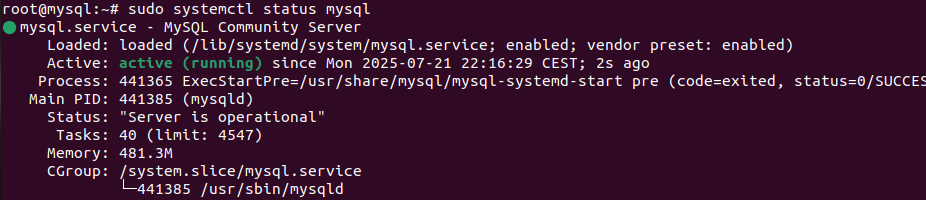
Once installed, the MySQL service starts automatically. To verify:
sudo systemctl status mysql
If running correctly, the output will show that the service is active.
 If MySQL server does not automatically start, you can use the following command to start it:
sudo systemctl start mysql
And start it automatically at system startup:
sudo systemctl enable mysql
Securing the installation
A basic security setup is recommended after installation. This helps disable anonymous access, remove the test database, and set a root password.
Run the provided security script:
sudo mysql_secure_installation
Answer the prompts based on the intended usage and environment requirements. For most setups, it is common to remove anonymous users, disallow remote root access, and delete the test database.
Allowing remote connections
In many setups, the application and database run on the same machine. It's straightforward to manage and usually enough for small projects or early-stage development. But as the system grows and starts handling more traffic, this type of architecture can introduce performance limits and security concerns.
A widely used approach to address this is to move the database to its own dedicated server. This separation makes it possible to better isolate responsibilities, improve monitoring, and optimize performance independently. Remote access becomes essential in this setup, as the application needs to communicate with the database across machines.
By default, MySQL is restricted to local connections. To allow remote access, some configuration changes are needed. Start by editing the config file:
sudo nano /etc/mysql/mysql.conf.d/mysqld.cnf
Change the bind-address setting:
Use
127.0.0.1to allow only local connections (default)Use
0.0.0.0to accept connections from any IPUse a specific IP to allow connections only through that network interface
For example, this will listen on all interfaces:
bind-address = 0.0.0.0
Restart MySQL to apply changes:
sudo systemctl restart mysql
If the system uses a firewall, make sure to allow incoming connections on MySQL's default port:
sudo ufw allow 3306
sudo ufw reload
This step is essential. Even if MySQL is configured to accept external connections, the operating system will still block them unless the firewall allows traffic through port 3306. For better security, access should be restricted to known IP addresses when possible, either through firewall rules or by using a specific bind address.
Creating a remote user
Once MySQL is set to accept remote connections, a user must be created or updated to allow external access with the right level of permissions.
Start by accessing the MySQL shell:
sudo mysql -u root -p
To allow a user to connect from any host and have full access to a database:
CREATE USER 'remote_user'@'%' IDENTIFIED BY 'remote_user_password';
GRANT ALL PRIVILEGES ON my_database.* TO 'remote_user'@'%';
FLUSH PRIVILEGES;
This setup is quick and useful in internal or development environments where full control is needed. However, it also gives the user the ability to drop tables, change structures, and perform administrative actions, which may not be suitable in all cases.
For a more secure setup, grant only the required permissions. For example, to allow basic read and write operations without structural access:
CREATE USER 'remote_user'@'%' IDENTIFIED BY 'remote_user_password';
GRANT SELECT, INSERT, UPDATE, DELETE ON my_database.* TO 'remote_user'@'%';
FLUSH PRIVILEGES;
In both examples, the % symbol allows the user to connect from any IP address. To limit this, it's better to use the specific IP of the client machine:
CREATE USER 'remote_user'@'192.168.1.50' IDENTIFIED BY 'remote_user_password';
This approach reduces exposure and helps control who can access the database, especially in production setups.
Basic connection test
Once configured, the server can be tested using the MySQL client. From any system with MySQL client installed:
mysql -u someuser -p -h server_ip_address
After entering the password, the connection should succeed. To check the server responds correctly, try:
SHOW DATABASES;
SELECT VERSION();
These basic queries confirm that the connection works and the server is responding.
Conclusion
Installing and configuring MySQL 8 server doesn't need to be complicated. With proper setup and basic security steps, the server can be up and running quickly, both for local and remote use. Once operational, MySQL provides a strong foundation for managing relational data across many types of projects.


0 Comments