Connecting to remote server using SSH
Secure Shell (SSH) is a protocol that provides secure command-line access to a remote server. By using SSH, you can remotely log in and run commands as if you were sitting right at the server.
The benefit of using SSH over other methods of remote access is that, as the name suggests, communications are securely encrypted, protecting the traffic flowing to and from the server. Data is encrypted at both ends of the client/server connection using a digital security certificate and access credentials are also protected.
Prerequisites
Before you can establish SSH connection with a remote machine, there are a few basic requirements to meet:
The client and server applications need to be installed and enabled.
You need the IP address or the name of the remote machine you want to connect to.
You need to have the necessary permissions to access the remote computer.
Firewall settings need to allow the remote connection (usually on port 22).
Basic connection
The most basic form to connect to a remote server is:
ssh <username>@<host>
The <host> in this example is the IP address or domain name that you are trying to connect to. Once you have connected to the server, you may be asked to verify your identity by providing a password. Later, we will cover how to generate keys to use instead of passwords.
To exit the ssh session and return back into your local shell session, type:
exit
SSH keys
While it is helpful to be able to log in to a remote system using passwords, it’s a much better idea to set up key-based authentication. An SSH key is an access credential in the SSH protocol. Its function is similar to that of usernames and passwords but the keys are primarily used for automated processes and for implementing single sign-on by system administrators and power users.
Keys come in pairs of a public key and a private key. Each key pair is unique and the two keys work together:
A public key that is copied to the SSH server(s). Anyone with a copy of the public key can encrypt data which can then only be read by the person who holds the corresponding private key. Once an SSH server receives a public key from a user and considers the key trustworthy, the server marks the key as authorized in its authorized_keys file. Such keys are called authorized keys.
A private key that remains (only) with the user. The possession of this key is proof of the user's identity. Only a user in possession of a private key that corresponds to the public key at the server will be able to authenticate successfully. The private keys need to be stored and handled carefully, and no copies of the private key should be distributed. The private keys used for user authentication are called identity keys.
Generating SSH keys
SSH keys should be generated on the computer you wish to log in from. This is usually your local machine. Enter the following into the command line replacing <keyname> parameter with the desired key name to create a key pair:
cd ~/.ssh && ssh-keygen -f <keyname>
The generation wizard will ask you for a key passphrase. Press enter to accept the defaults.
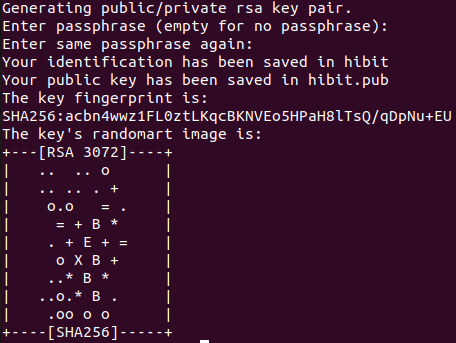
To see the content of your public key, use the following command replacing <keyname> with the choosen key name:
cat <keyname>.pub
The output will be similar to:

Authorizing SSH connection
Now that you have an SSH key pair, you're ready to authorize the connection. If your server on the remote system doesn't already contain an authorized_keys file, create one; on the command line, enter the following command:
cd ~/.ssh && touch ~/.ssh/authorized_keys
Then add the content of your public key file to a new line in your authorized_keys file; on the command line, enter:
echo "PUBLIC_KEY_CONTENT" >> authorized_keys
You now should be able to SSH to your account on the remote system:
ssh <user>@<host> -i <keyname> -p <port>
Add the key to the SSH agent
If you don't want to type your password each time you use the key, you'll need to add it to theSSH agent.
To start the agent, run the following:
eval `ssh-agent`
Then, add the key to the agent providing the path to the private key file:
ssh-add ~/.ssh/<keyname>
From now on, you will not be prompted for the password when using SSH or SCP to connect to hosts with your public key.
Configuration file
The SSH receives its configuration from either the command line or from configuration files. By default, the SSH configuration file may not exist, so you may need to create it:
touch ~/.ssh/config
In the previous connection, we explicitly specify the port number, the username and the host directly in the command line. However, you can also define these settings in the config file:
Host <name>
    HostName <host>
    Port <port>
    User <user>
    IdentityFile ~/.ssh/<keyname>
Note: the <name> value can be any name you want, it's simply a label for the other settings.
Now ssh client will read the configuration file and connection can be established simply with:
ssh <name>


0 Comments