BitBucket OAuth2.0 access for web application
Bitbucket is git repository management solution designed for professional teams. It gives you a central place to manage git repositories, collaborate on your source code and guide you through the development flow. Their platform allows third party websites to use BitBucket as registration or login option with just a few clicks. That is the social login and it allows customers to bring their existing social identities and use them to register and log in without creating a new account explicitly. It saves a lot of time for users and makes the life easier as we don't need to remember all those credentials for different websites anymore.
Prerequisites
BitBucket can be popular sign in option but it's still an option. There are many alternatives and all of them can work together. We recommend you to read about OAuth 2.0 protocol and how it works. We have a detailed post about it here: understanding OAuth 2.0 and how it works.
You will need a BitBucket account (Atlassian to be more specific) to generate a client id and a client secret. If you don't have an account, create one from here: BitBucket SignUp.
Configuring BitBucket APP
First, you must login to your existing or recently created account. Open the user drop down menu clicking on your avatar on the top right corner and navigate to your workspace. There will be another menu on the left sidebar:
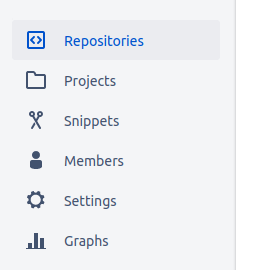
Scroll down to Settings link and click on it. Inside you should see OAuth consumers section to setup your application:
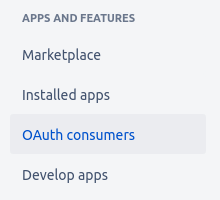
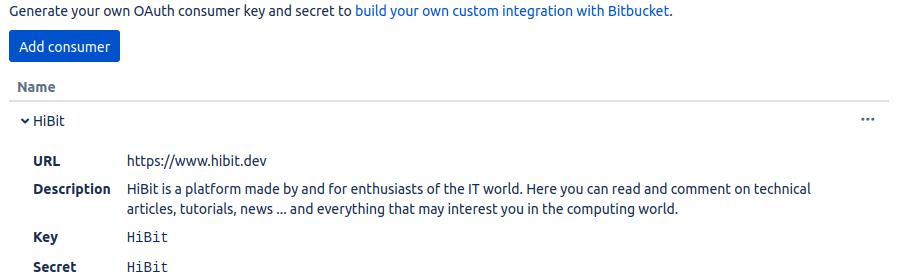
If you don't have applications yet, you will see the following screen with an option to add a new consumer:

There will be a simple form to fill indicating your application name and some details about it.
Credentials and permissions
You will be asked to provide some information about your app and callback URL. This URL will be used by BitBucket to send back the authorization data to your application.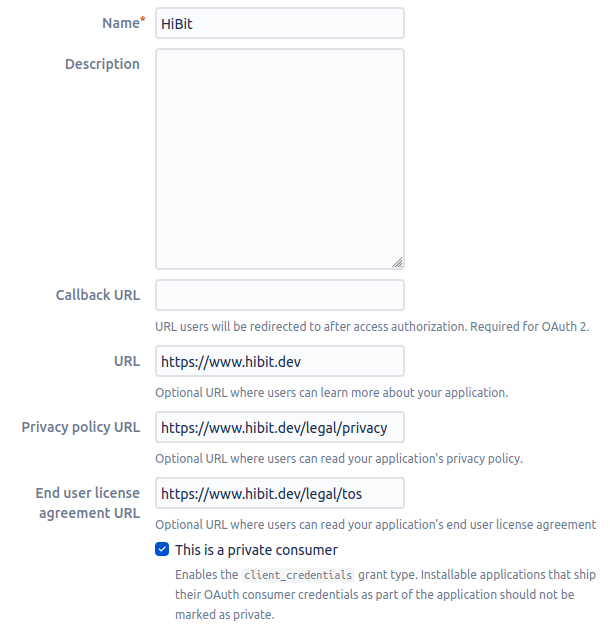
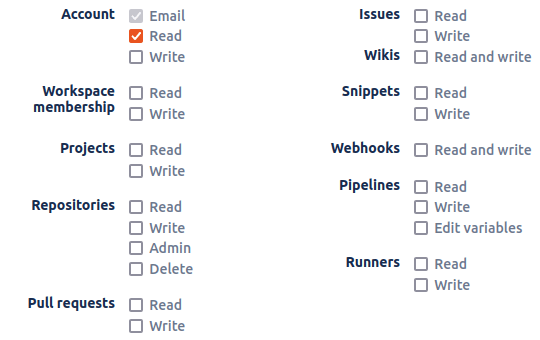
Next to the application form you will find permissions (aka scopes) list. Select the granted permissions for your application. For sign in purpose it's enough having account email and account read as shown on the image:
Once registered with application information a client ID (key) and client secret will be generated.
Save them in a secure place and don't share with anyone.
Configuring your application
The web application flow to authorize users for your app is:
Users are redirected to request their BitBucket identity
Users are redirected back to your site by BitBucket
Your app accesses the API with the user's access token
Request a user's BitBucket identity
Your first step is to create the authorization request. That request sets parameters that identify your application and define the permissions that the user will be asked to grant to your application.
BitBucket's OAuth 2.0 endpoint is at:
https://bitbucket.org/site/oauth2/authorize
The BitBucket authorization server supports the following query string parameters:
Name | Type | Description |
client_id | Required | The client ID you received from BitBucket when you registered your application. |
response_type | Required | Determines whether the BitBucket OAuth 2.0 endpoint returns an authorization code. |
Users are redirected back to your site by BitBucket
If the user accepts your request, BitBucket redirects back to your site with a temporary code in a code parameter. Exchange this code for an access token making a POST request to the URL below:
https://bitbucket.org/site/oauth2/access_token
and set the following parameters:
Name | Type | Description |
client_id | Required | The client ID you received from BitBucket for your OAuth App. |
client_secret | Required | The client secret you received from BitBucket for your OAuth App. |
code | Required | The code you received as a response from the initial request. |
grant_type | Required | As defined in the OAuth 2.0 specification, this field's value must be set to authorization_code. |
Client id and Client secret must be sent as username and password for your request. In CURL it will look like as following:
curl -X POST -u "client_id:client_secret"
  https://bitbucket.org/site/oauth2/access_token
  -d grant_type=authorization_code -d code={code}
By default, the response takes the following form:
Name | Description |
access_token | The token that your application sends to authorize a BitBucket API request. |
scope | The scopes of access granted by the access_token expressed as a list of space-delimited, case-sensitive strings. |
token_type | The type of token returned. At this time, this field's value is always set to Bearer. |
The access token represents not an end user but the owner of the client/consumer. Access tokens expire in two hours. When this happens you'll get 401 responses.
Use the access token to access the API
The access token allows you to make requests to the API on a behalf of a user. Use the following endpoint:
https://api.bitbucket.org/2.0/user
Providing the access token generated in the previous step with one of the following methods:
Send it in the request Authorization header:
Authorization: Bearer <access_token>
Include it in the POST body:
access_token=<access_token>
Put it in the query string of a non-POST:
?access_token=<access_token>
Depending on the selected scope you will be able to access to more or less information about the user.
Conclusion
We've described and learned how the complete OAuth 2.0 flow works with BitBucket. It's easy and quite forward. You can have your application within minutes and test BitBucket responses by yourself.


0 Comments