Using touch sensor with Arduino
Touch sensor (also known as touch button) is widely used to control devices. It detects touch, force or pressure on its surface changing the logic state of the circuit. Actually, it works in very similar way as to buttons. Checkout the wiring and Arduino code implementation to track the current state and the state changes.
Components
| 1x Arduino Nano (or another Arduino module)
|
| 1x Mini-breadboard
|
| 1x Touch sensor
|
| Dupont wires
|


Wiring schema
This example demonstrates the use of a touch sensor with Arduino Nano. By default, the signal value is LOW and it switches to HIGH when the touch sensor is pressed.
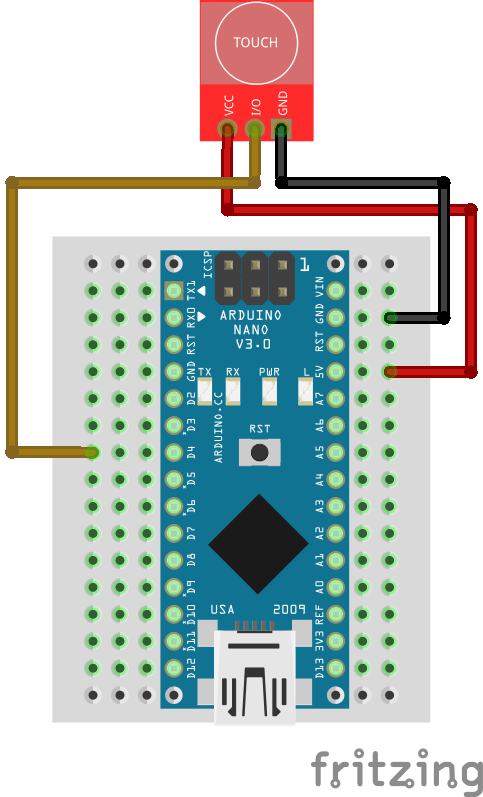
Note: the button pin can be connected to Arduino Nano D4 or any other digital input pin.
Arduino code
We've defined a struct (called touch) to represent the current state of the touch sensor and the state in the previous loop iteration. The serial monitor will output a message when the sensor changes the state, i.e., is pressed, in real time.
#define BUTTON_PIN 4

struct touch {
  byte wasPressed = LOW;
  byte isPressed = LOW;
};

touch touch;

void setup()
{
  pinMode(BUTTON_PIN, INPUT_PULLUP);

  Serial.begin(115200);
}

void loop()
{
  touch.isPressed = isTouchPressed(BUTTON_PIN);

  if (touch.wasPressed != touch.isPressed) {
    Serial.println("Touch pressed");
  }

  touch.wasPressed = touch.isPressed;
}

bool isTouchPressed(int pin)
{
  return digitalRead(pin) == HIGH;
}
Note: any other digital PIN may be used.
Credits
Official GitHub: https://github.com/hibit-dev/touch


0 Comments