Install and configure Apache on Ubuntu
Apache or Apache HTTP server is a free and open source web server, developed and maintained by the Apache Software Foundation. It is one of the most popular web servers in the world. Apache allows website developers to serve their content over the web and provides many powerful features that can be extended through additional modules.
Installing Apache
Apache is available and can be installed using the apt packaging system:
sudo apt-get update && apt-get install apache2
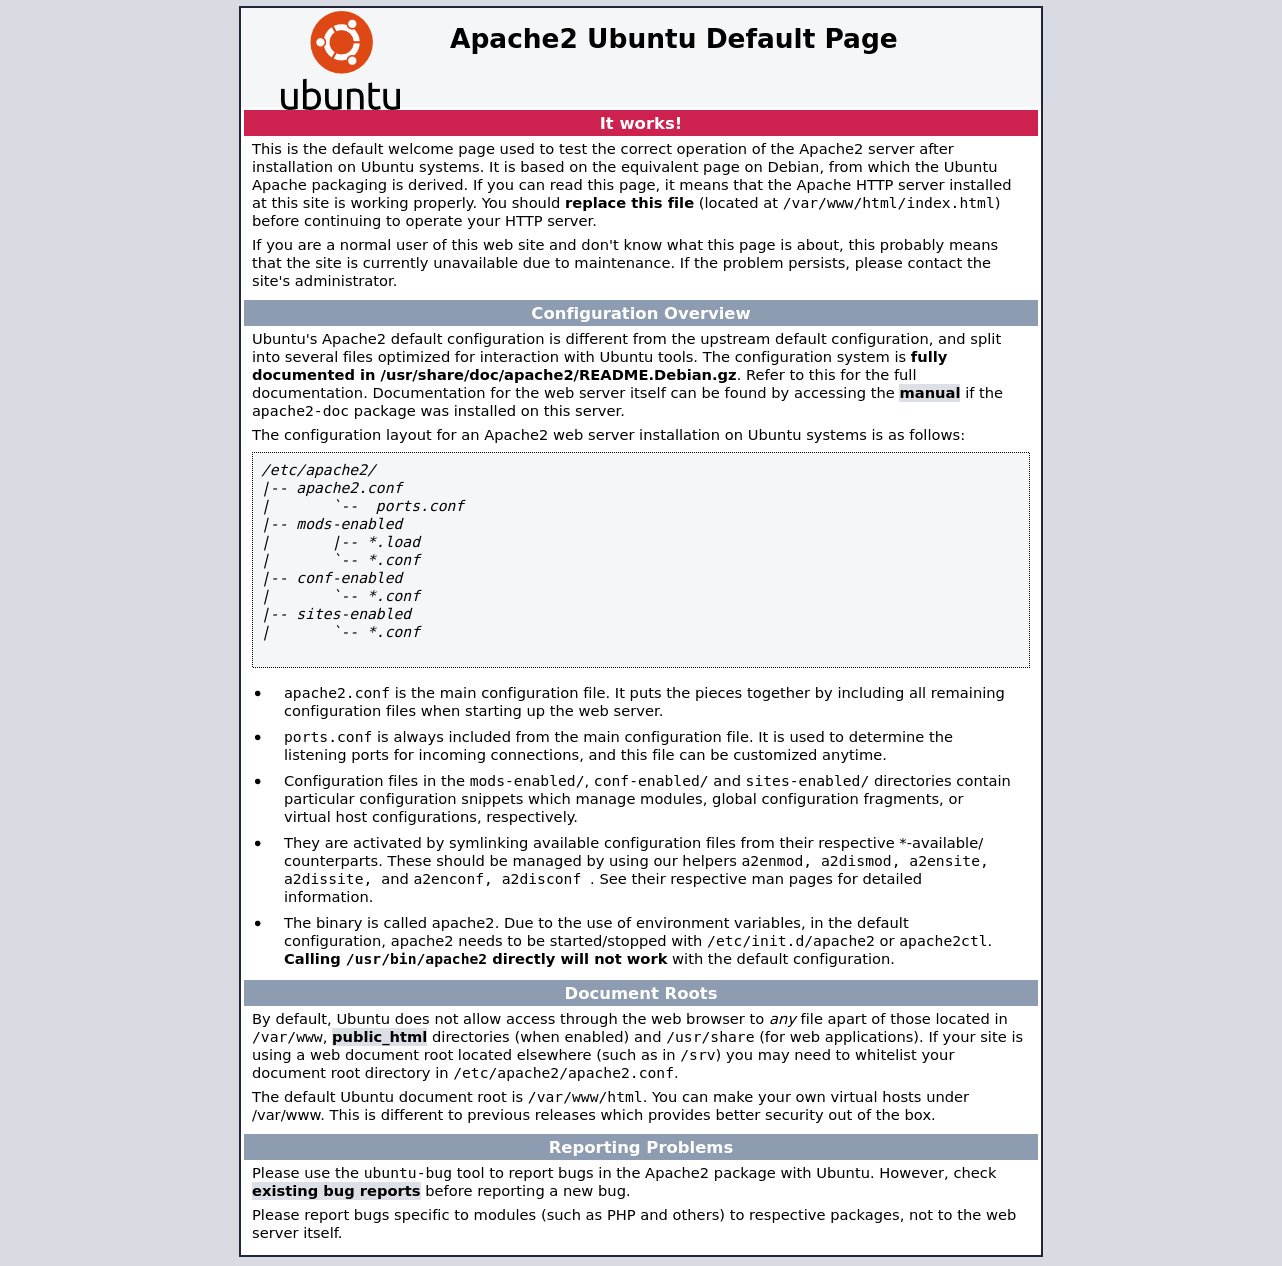
Package manager will install the server and all the dependencies. You can point your browser to your server IP address (or localhost). You should see this page:
Configure the firewall
For additional security some settings must be applied to the firewall software to allow access to the service. Apache is automatically registered as a service with ufw upon installation making it easy to allow Apache access.
You can list available configurations with the following command:
sudo ufw app list
You should get a listing of the application profiles:
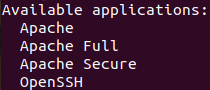
There are three profiles available for Apache:
Apache: this profile opens only port 80 (normal, unencrypted web traffic)
Apache Full: this profile opens both port 80 (normal, unencrypted web traffic) and port 443 (TLS/SSL encrypted traffic)
Apache Secure: this profile opens only port 443 (TLS/SSL encrypted traffic)
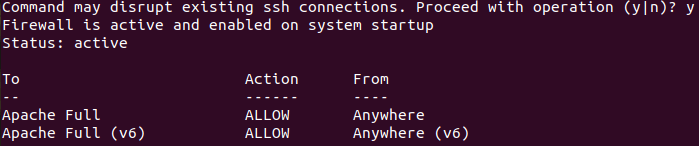
In our case we select the FULL profile and allow traffic on ports 80 and 443:
sudo ufw allow 'Apache Full'
![]()
Enable ufw and verify the change by typing:
sudo ufw enable && ufw status
Managing the Apache process
Now that you have your web server up and running you can use the following commands to manage the apache process:
sudo systemctl [stop|start|restart|reload|disable|enable] apache2
Files and directories
We already have the web server but... where do we upload the files? The structure of the files is clear:
Content
/var/www/html: The actual web content, which by default only consists of the default apache page.
Configuration
/etc/apache2: The apache configuration directory. All of the apache configuration files are here.
/etc/apache2/apache2.conf: The main apache configuration file. This can be modified to make changes to the apache global configuration.
/etc/apache2/ports.conf: This file specifies the ports that apache will listen on (by default: 80 and 443).
/etc/apache2/sites-available/: directory where separated site settings can be saved.
/etc/apache2/sites-enabled/: directory where we link one of the previous configurations and also mark them as active.
There are more directories and configuration files, which are detailed in the Apache documentation. These can be used to add modules to enhance Apache’s functionality or to store additional configuration information.
Logs
/var/log/apache2/access.log: every request to the web server is recorded in this log file.
/var/log/apache2/error.log: all apache errors will be recorded in this log.
Conclusion
Installing and configuring Apache for basic setup is quite easy. However, it has a lot of configuration and tuning options. Take into consideration that you also can use the file .htacess (usually located in your public content directory) to configure certain behavior of Apache HTTP. One major application of this file is to redirect an URL to another URL.


0 Comments