How to use potentiometer with Arduino
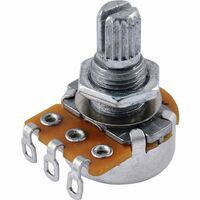
A potentiometer is a simple knob that provides a variable resistance, which we can read into the Arduino board as an analog value. They can be attuned from zero ohms to whatever maximum resistance that is specific to it. For example, a potentiometer of 10 kΩ can be adjusted from 0 Ω to its maximum of 10 kΩ.
Components
| 1x Arduino Nano (or another Arduino module)
|
| 1x Mini-breadboard
|
| 1x Potentiometer
|
| Dupont wires
|
Wiring schema
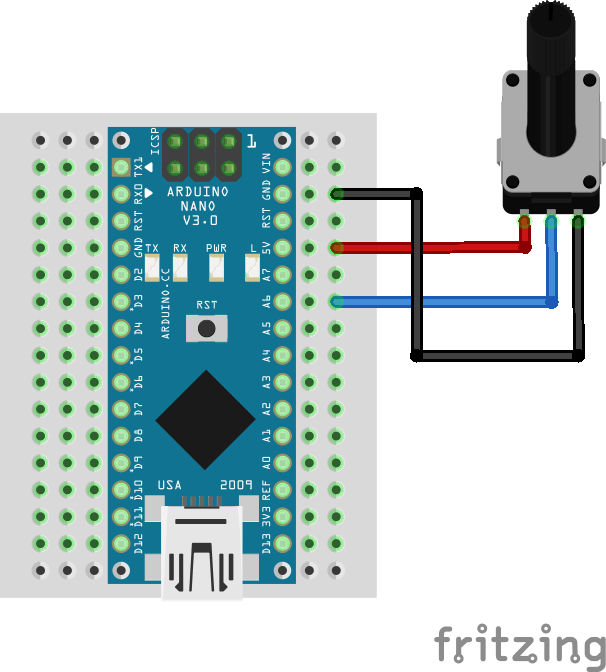
All potentiometers have three pins. The outer pins are used for connecting power source (5V and GND). The middle pin (output) give us the variable of resistance value. We will connect the output pin to any analog pin on our Arduino (A6 in this example). By turning the shaft of the potentiometer, we change the amount of resistance on either side of the wiper which is connected to the center pin of the potentiometer. When the shaft is turned all the way in one direction, there are 0 volts going to the pin, and we read 0. When the shaft is turned all the way in the other direction, there are 5 volts going to the pin and we read 1023.

Arduino code
We've defined a struct (called potentiometer) to represent the state of the potentiometer. The serial monitor will output that value in real time.
#define POTENTIOMETER_PIN A6

struct potentiometer {
  byte level = 0;
};

potentiometer potentiometer;

void setup()
{
  pinMode(POTENTIOMETER_PIN, INPUT);

  Serial.begin(115200);
}

void loop()
{
  potentiometer.level = readPotentiometerLevelMapped(POTENTIOMETER_PIN);

  Serial.print("Potentiometer value [0-255]: ");
  Serial.println(potentiometer.level);
}

byte readPotentiometerLevelMapped(int pin)
{
  return map(analogRead(pin), 0, 1023, 0, 255);
}
Note: read value is mapped to [0-255] range to represent it with only 1 byte.
Credits
Official GitHub: https://github.com/hibit-dev/potentiometer


0 Comments