joystick


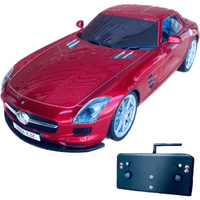
Mastering the E88 Pro drone

  • avatar
  • 5.5K Views
  • 17 Likes
  • 6 mins read
Preview post image

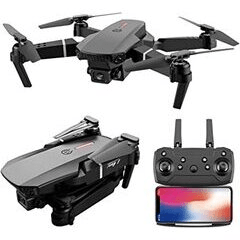
The E88 Pro Drone is an exceptional flying device that combines advanced features, reliable performance, and a user-friendly design. Built with innovation in mind, this drone offers an immersive aerial experience for beginners and enthusiasts alike. Operating the E88 Pro Drone is a breeze, thanks to its intuitive controls and user-friendly interface. The drone can be easily controlled using a dedicated remote controller or a smartphone application. The remote controller offers precise maneuverability, while the smartphone app provides a comprehensive set of features and flight modes. From automated flight paths to real-time video streaming, the app enhances the drone piloting experience and unlocks advanced functionalities.

How to use potentiometer with Arduino

  • avatar
  • 2.7K Views
  • 3 Likes
  • 4 mins read
Preview post image

A potentiometer is a simple knob that provides a variable resistance, which we can read into the Arduino board as an analog value. They can be attuned from zero ohms to whatever maximum resistance that is specific to it. For example, a potentiometer of 10 kΩ can be adjusted from 0 Ω to its maximum of 10 kΩ.

How to use an analog module with Arduino

  • avatar
  • 2.0K Views
  • 1 Like
  • 4 mins read
Preview post image

The KY-023 is an easy-to-use analog joystick. The joystick uses a biaxial potentiometer to control the X and Y axis. It also has an integrated push button. In this tutorial, it is shown how to connect the KY-023 joystick with the Arduino and how to use it.

 Join Our Monthly Newsletter

Get the latest news and popular articles to your inbox every month

We never send SPAM nor unsolicited emails

DIY - Remote control car running on Arduino

  • avatar
  • 1.3K Views
  • 2 Likes
  • 18 mins read
Preview post image

Radio control cars are small vehicles powered by electric or gas motors that can be remotely controlled by a transmitter. The transmitter sends signals to a receiver on the car, allowing the operator to control the car's speed, direction, and steering. Radio control cars are available in a variety of sizes, from miniature models that can fit in the palm of your hand to large off-road vehicles that can climb over rough terrain.

DIY - Remote control car running on Arduino: code

  • avatar
  • 1.3K Views
  • 2 Likes
  • 9 mins read
Preview post image

The physical assembly of the car has been completed with all the components properly installed and ready for use. The next steps involve reprogramming the Arduino Nano with the appropriate software to enable all the features, including pairing the car with the AirControl joystick via the NRF24L01 module.

DIY - Universal RC Joystick

  • avatar
  • 1.2K Views
  • 7 Likes
  • 23 mins read
Preview post image

Controlling devices over a distance opens lots of possibilities. Our Arduino roadmap contains many projects that must be controlled remotely and sometimes on a long-distance. Of course, it can be done with a PC but our experience has shown that it becomes complicated when you need long way, portable and rapid communications. Our solution was designing a multi-functional remote controller, we have called it AirControl. Aware of the needs it will have 4 push buttons, 2 switch buttons, 2 potentiometers and two analog modules. Additionally, each analog joystick module has integrated push button.

DIY - Universal RC Joystick: receiver

  • avatar
  • 1.1K Views
  • 1 Like
  • 10 mins read
Preview post image

Wireless communication implies having a transmitter, in our case the joystick, and a receiver. We must build a simple circuit with NRF24L01 wiring that will act as listener for our joystick. The NRF24L01 module strictly needs 3.3V but the logic pins are 5V tolerant. That why we recommend to use the NRF24L01 adapter which acts as regulator, keep the voltage stable, apply filtering and reduce noises.

DIY - Remote control car running on Arduino: mounting

  • avatar
  • 939 Views
  • 4 Likes
  • 8 mins read
Preview post image

With the idea of making a remote-controlled car in mind, we began our investigation by disassembling the frame to uncover its internal components and understand how they work. By gaining a clear understanding of the car's original configuration, we were able to approach the modifications with greater confidence, knowing what changes were necessary and how they would integrate with the existing system.

DIY - Universal RC Joystick: controls

  • avatar
  • 1.0K Views
  • 2 Likes
  • 3 mins read
Preview post image

Based on the solution of designing multi-functional remote controller and being aware of the needs we started building the joystick. It will have 4 push buttons, 2 switch buttons, 2 potentiometers and two analog modules. And, additional 2 push buttons integrated on the analog joystick module.

DIY - Universal RC Joystick: code

  • avatar
  • 850 Views
  • 2 Likes
  • 10 mins read
Preview post image

The physical part of the controller is finished but what about the brain? Once more, our decision falls on Arduino Nano. It perfectly fits by size providing all the necessary functionality. For programming a Nano board we need a USB to serial interface which can be hooked up to the programing header located on the top side of our controller.