resistor


How to use potentiometer with Arduino

  • avatar
  • 2.7K Views
  • 3 Likes
  • 4 mins read
Preview post image

A potentiometer is a simple knob that provides a variable resistance, which we can read into the Arduino board as an analog value. They can be attuned from zero ohms to whatever maximum resistance that is specific to it. For example, a potentiometer of 10 kΩ can be adjusted from 0 Ω to its maximum of 10 kΩ.

How to control mini water pump with Arduino

  • avatar
  • 1.8K Views
  • 1 Like
  • 7 mins read
Preview post image

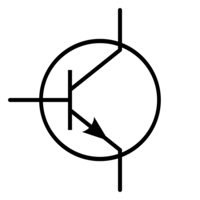
The advent of Arduino microcontrollers has revolutionized the world of electronics and automation. With their user-friendly interface and vast array of modules and sensors, Arduino boards have become the go-to choice for hobbyists and professionals alike. In this article, we will explore the significance of a 5V water pump module, the importance of using transistors, and how to effectively connect the two to create an efficient water control system.

Using push buttons with Arduino

  • avatar
  • 2.1K Views
  • 1 Like
  • 4 mins read
Preview post image

Today we are going to speak about push buttons, the wiring and how to implement the code for this circuit elements in Arduino. Push buttons connect two points in a circuit when you press them. That means that logic state of the circuit change when you press and keep pressed the button.

 Join Our Monthly Newsletter

Get the latest news and popular articles to your inbox every month

We never send SPAM nor unsolicited emails

Pull-up and Pull-down resistors

  • avatar
  • 1.7K Views
  • 4 mins read
Preview post image

A resistor is a passive two-terminal electrical component that implements electrical resistance as a circuit element. In electronic circuits, resistors are used to reduce current flow and adjust signal levels among other uses. Resistance is measured in Ohm with a sign of Ω.

A microcontroller (e.g. Arduino) utilizes I/O signals for communication with external hardware devices, where the most commonly known being GPIO. As a reminder, digital logic circuits have three logic states: high, low and floating (or high impedance). When there’s nothing connected to your GPIO pins, your program will read a floating impedance state, which we do not want. To achieve either high or low states, we’ll have to implement pull-up or pull-down resistors in our digital circuit.

Connecting a motor to Arduino

  • avatar
  • 671 Views
  • 1 Like
  • 7 mins read
Preview post image

Arduino microcontrollers are the heart of countless DIY projects, from robots to automated systems. To bring these projects to life, you often need to interface them with motors. In this guide, we'll walk you through the essential steps of connecting a motor to an Arduino using a separate power supply while ensuring control with precision using an NPN transistor. This approach allows you to harness the full potential of your motorized creations without overloading your Arduino.

Using switch buttons with Arduino

  • avatar
  • 1.1K Views
  • 3 Likes
  • 4 mins read
Preview post image

Let's speak now about switch buttons, the wiring and how to implement the code for this circuit elements in Arduino. Switch buttons connect two points in a circuit when you press them and maintain the state without the need to keep the button pressed. That means that logic state of the circuit change every time you press the button.

Using transistors in electronic circuits

  • avatar
  • 514 Views
  • 7 mins read
Preview post image

Transistors are fundamental semiconductor devices that revolutionized the world of electronics. Among various types of transistors, Bipolar Junction Transistors (BJTs) hold significant importance due to their widespread use in amplification, switching, and signal processing applications. This article will explore the two main types of BJT transistors: NPN and PNP. We will explore their basic structures, operating principles, and essential circuit elements required for their proper functioning.