wiring


Wi-Fi Integration made easy with ESP8266WiFi library

Available to registered members only
  • avatar
  • 1.2K Views
  • 2 Likes
  • 12 mins read
Preview post image

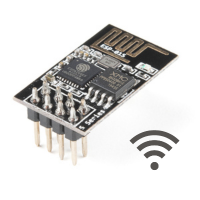
The ESP8266 is a low-cost Wi-Fi microchip with full TCP/IP stack and microcontroller capability, created by Espressif Systems. It's popular among hobbyists and developers for its affordability and ease of use, making it a go-to choice for various IoT projects. When paired with the ESP8266WiFi library, this tiny module becomes even more powerful, simplifying the process of connecting devices to Wi-Fi networks and enabling a multitude of creative applications.

Regulated power supply module based on AMS1117

  • avatar
  • 2.0K Views
  • 5 Likes
  • 3 mins read
Preview post image

We often use the power supplies like batteries or direct AC/DC supply which are normally in higher ranges compared to the actual requirement for the circuit. In that cases we need this kind of voltage regulators which can regulate and vary the voltage levels for the circuit requirement.

The AMS1117 series of chips are linear voltage regulators with low voltage drop. The modules based on the AMS1117 chip provide constant 3.3V or 5V outputs from an unregulated DC input. It's very compact and can be included in your project schema or you can use it together with a breadboard for circuit testing.

Controlling fan speed with Arduino using a potentiometer

  • avatar
  • 720 Views
  • 1 Like
  • 5 mins read
Preview post image

Adjusting a fan's speed using an Arduino is a great way to learn about PWM (Pulse Width Modulation) and motor control. With just a potentiometer and some simple wiring, you can create a smooth, manual speed adjustment system. This setup is useful for cooling electronics, ventilation projects, or any application where adjustable airflow is needed.

 Join Our Monthly Newsletter

Get the latest news and popular articles to your inbox every month

We never send SPAM nor unsolicited emails

DYI - Programmed Christmas lights: code

  • avatar
  • 671 Views
  • 4 mins read
Preview post image

Now that the hardware is set up, it’s time to add some magic with a custom program. Programming the Arduino Nano is where your project truly comes to life. This step transforms your fairy lights from simple decorations into a dynamic display that reacts and behaves exactly how you design it to. By using code, you can experiment with different effects, creating a lighting system that feels personal and unique. In this article, we’ll explore a sample code that controls the lights using predefined programs, offering a starting point for further creativity.

Using a motion sensor with Arduino
  • avatar
  • 492 Views
  • 7 mins read
Preview post image

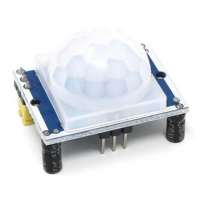
Motion sensors are essential in modern automation projects, playing a key role in security systems, smart lighting, and interactive devices. These sensors detect movement and trigger specific actions, making them useful for various applications. When paired with an Arduino, a motion sensor can be programmed to respond intelligently, creating an efficient and responsive system. This guide explains how motion sensors work, how to connect them to an Arduino, and how to write the code needed to make them function properly.
DYI - Programmed Christmas lights

  • avatar
  • 524 Views
  • 10 mins read
Preview post image

Take your holiday decorations to the next level with a custom fairy light display powered by an Arduino Nano. This project blends creativity and basic electronics, allowing you to program fairy lights with unique patterns and effects that reflect your personal style. By replacing generic, store-bought solutions with something custom-made, you’ll create a decoration that’s not only festive but truly one of a kind. With accessible components and straightforward steps, it offers an engaging way to add warmth and charm to your holiday season.

Interfacing USB to Serial converter module

  • avatar
  • 672 Views
  • 1 Like
  • 3 mins read
Preview post image

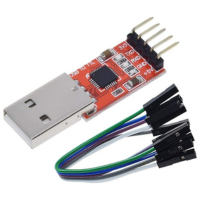
In electronic communication, the USB to UART serial converter module emerges as a crucial link, facilitating seamless data transfer between computers and UART-enabled devices. This unassuming yet indispensable device bridges the gap between USB and UART protocols. In this article, we will explore the necessity of this module, explain the user-friendly interfacing process, and highlight its critical pinout details.

DYI - Programmed Christmas lights: mounting

  • avatar
  • 453 Views
  • 8 mins read
Preview post image

Now that you're excited about the idea of custom Christmas lighting, it's time to focus on how to physically set everything up. Mounting is where your lighting project starts to take shape, turning ideas into something tangible. It’s the process of preparing and connecting the components that will bring your design to life. In this part, we'll focus on setting up the physical structure for your lighting. We'll outline how to connect your lights, controller, and power source to create a functional base for your project.