DIY - Universal RC Joystick: mounting
Based on the solution of designing multi-functional remote controller and being aware of the needs we started building the joystick. The cover with controls is ready for use but we miss the most important part: the microcontroller. Once more, our decision falls on Arduino Nano. It perfectly fits by size providing all the necessary functionality.
The responsible of wireless communication will be NRF24L01+PA+LNA module. The range extender chip along with external antenna helps the module achieve about 1000m. The NRF24L01 module strictly needs 3.3V but the logic pins are 5V tolerant. That why we recommend to use the NRF24L01 adapter which acts as regulator, keep the voltage stable, apply filtering and reduce noises.
Below you will find links to previous project posts.
AriControl project
DIY - Universal RC Joystick: concept
DIY - Universal RC Joystick: controls
DIY - Universal RC Joystick: mounting
DIY - Universal RC Joystick: code
DIY - Universal RC Joystick: receiver
Components
| 1x Arduino Nano (or another Arduino module) $3.39 |
| 1x Mini-breadboard
|
| 1x NRF24L01 (or NRF24L01+ or NRF24L01+PA+LNA) $2.22 |
| 1x NRF24L01 adapter $1.22 |
| 1x Voltage regulator with 5V output (AMS1117) $1.82 |
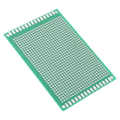
| 1x PCB board
|
| Dupont wires
|


Prerequisites
Understanding how each of the control elements work separately:
Mounting
For the joystick backside 4mm black acrylic is used. It gets together all the head components of our joystick. The adapter with NRF24L01+PA+LNA is aligned to center. On one side it has voltage regulator; on the other side mini-breadboard with Arduino. Chosen NRF24L01 module variation, with an amplified antenna, consumes more energy but provides better results for distance.
The reverse side has a 9V battery holder that will serve as a dedicated power supply. Therefore we need a voltage regulator to decrease that 9V to a constant 5V output. For this purpose AMS1117 series chip is placed between the power supply and all other circuit elements.
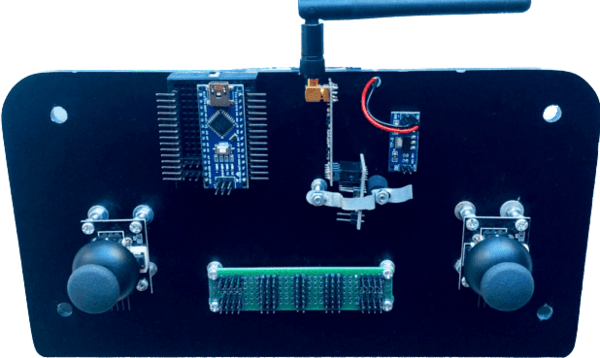
Analog joystick modules are located on this part too. They don't have the proper height so it was adjusted in order to be visible from the cover holes.
Connection hub
As you can see on the image there is a custom PCB board at the bottom. It acts as a connection hub to facilitate connections between different components.

Pins soldering was done with a specific purpose. Top corner pins will connect and act as VCC and bottom corner pins as GND. Pins in the middle are horizontally connected to act as jumpers.
Wiring schema
Let’s take a look at the circuit diagram. It seams complicated at first sight but it makes total sense when there is a clear understanding on how each component operates as independent unit.
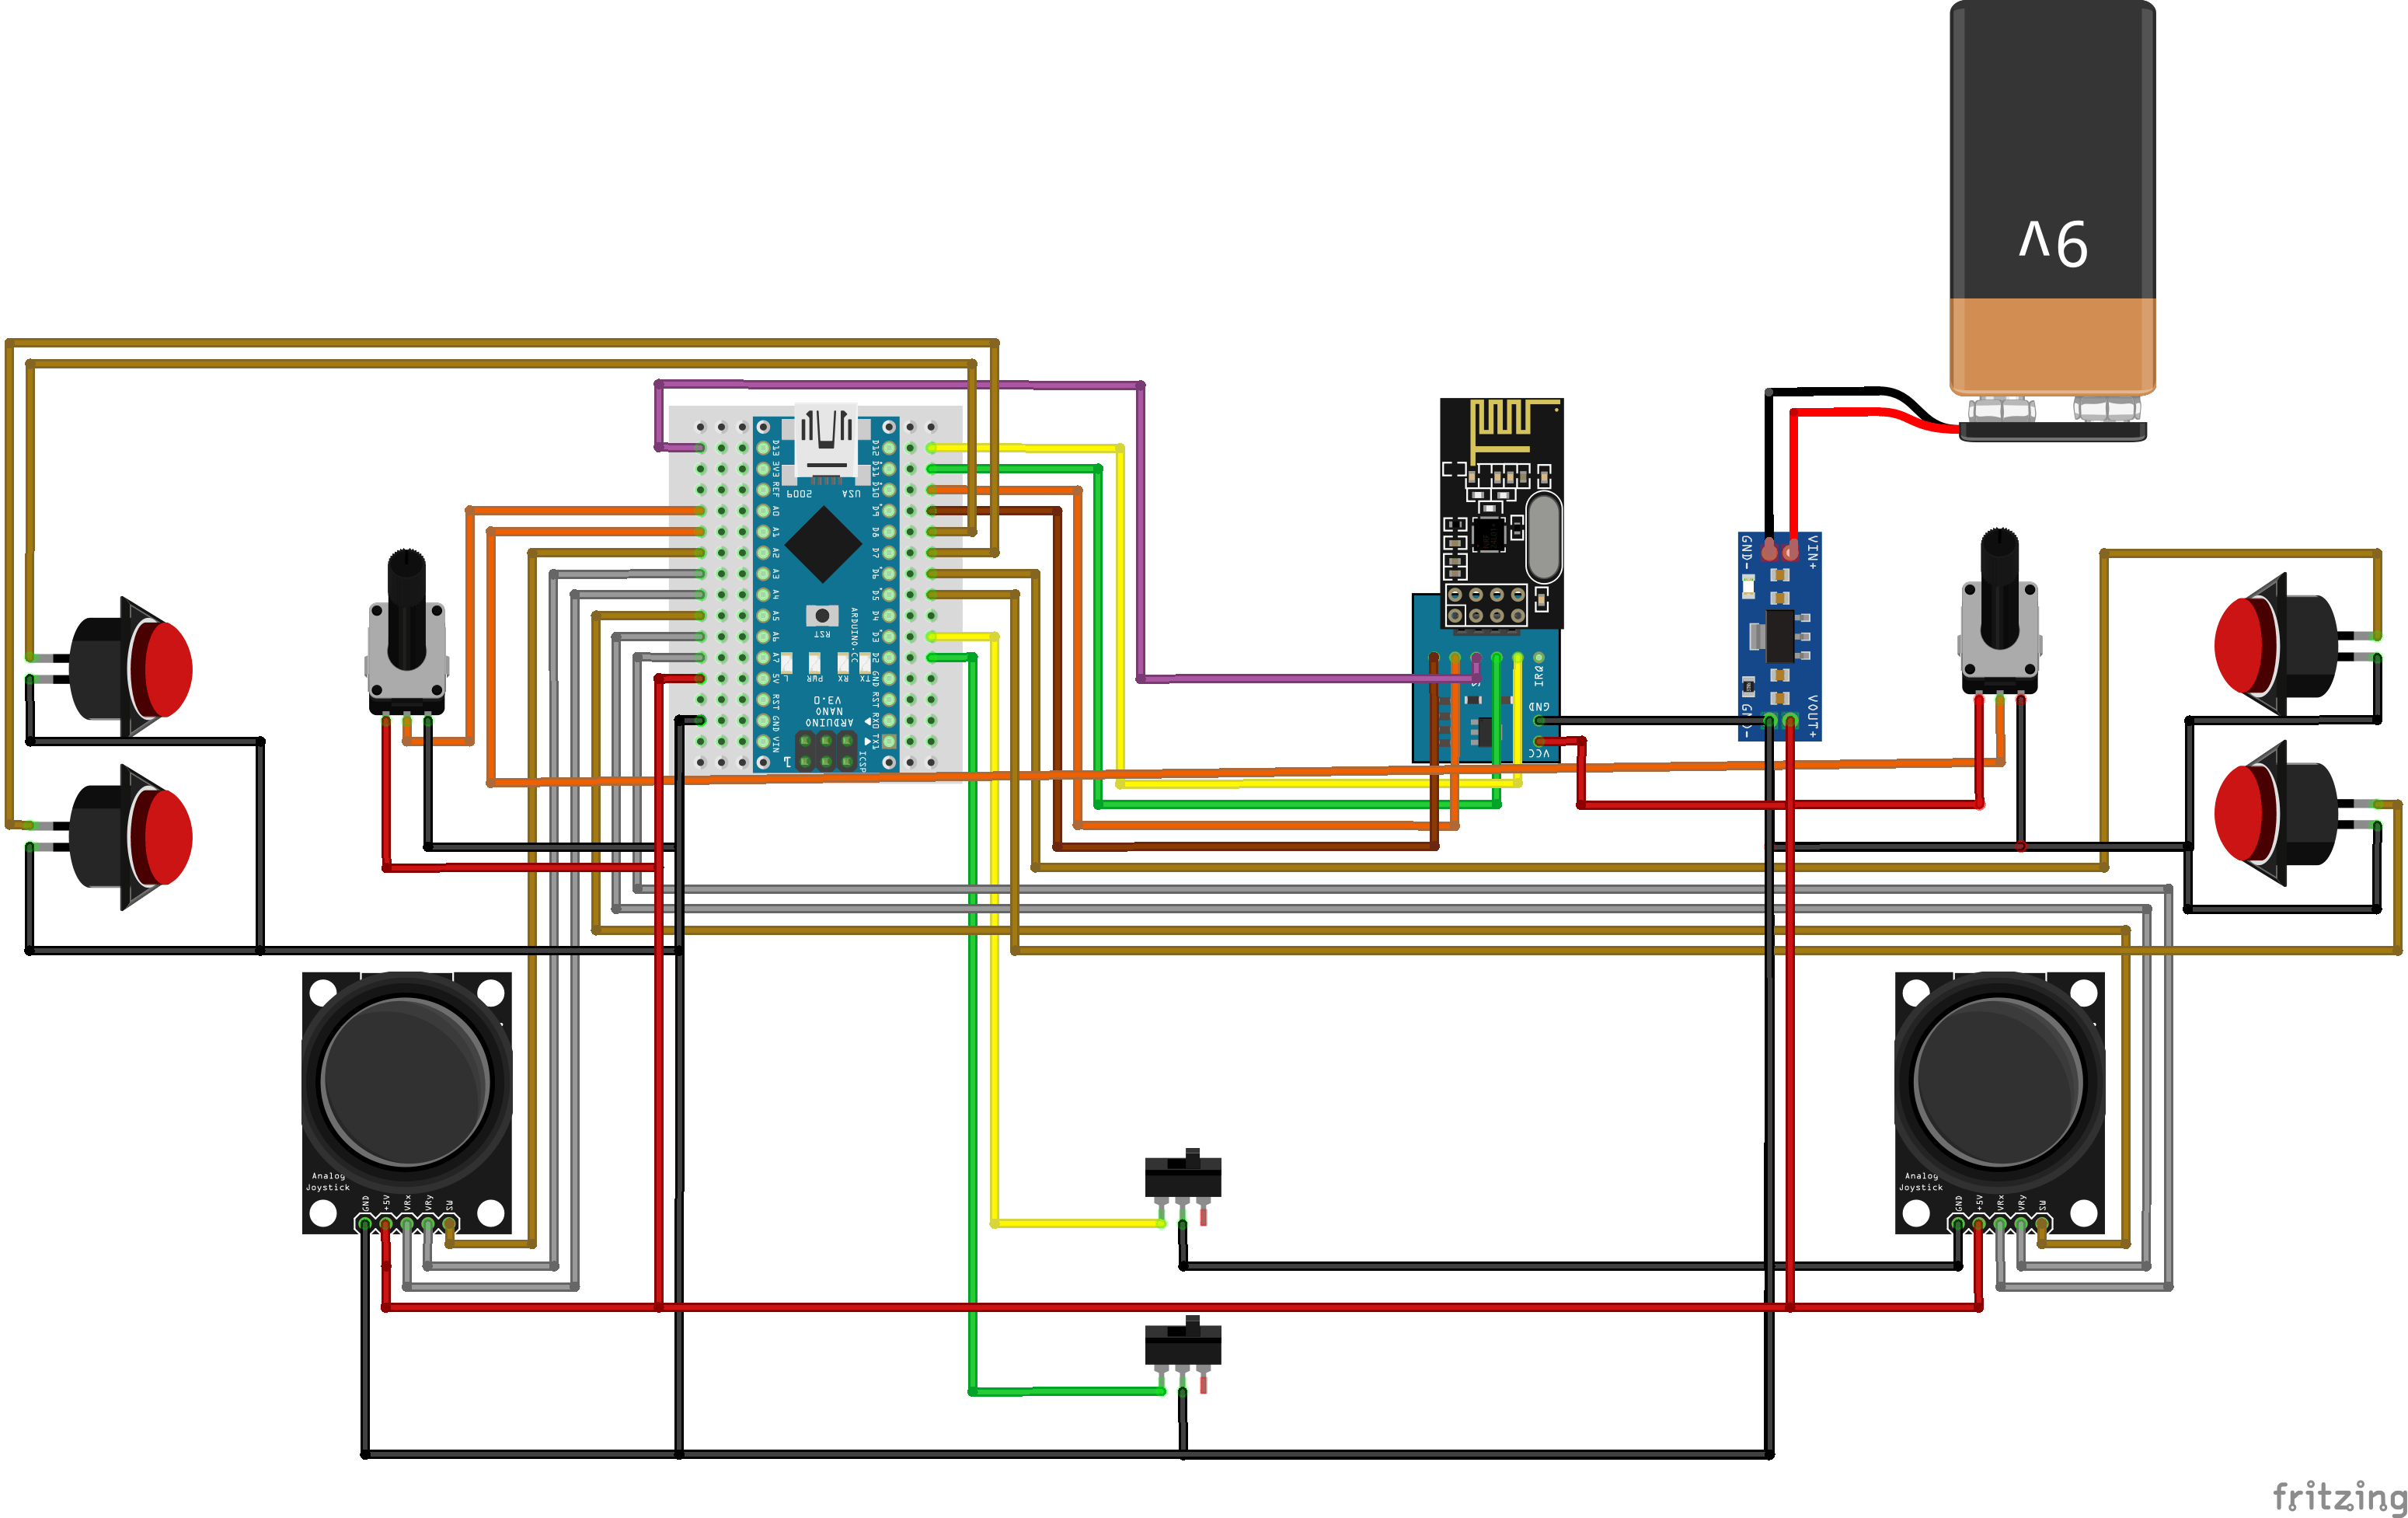
Control elements that need VCC connection use the regulated power from AMS1117. And, all the GND connections finally converge in the same point, going directly to AMS1117 module GND pin.
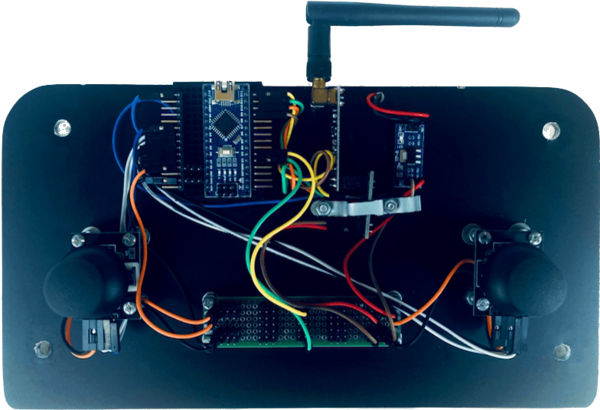
So, how it looks like in the real life? Take a look.
Available Arduino pins will be used to connect the joystick controls located on the cover as shown on the circuit diagram: directly or through the connection hub.
Conclusion
We actually ended up using almost all analog and digital pins of the Arduino Nano. The position of Arduino makes easy to connect the USB, debug or reprogram the joystick in case it's needed. In the following posts we will share the code used to run AirControl.


0 Comments