Pressure and temperature measurement with GY-68
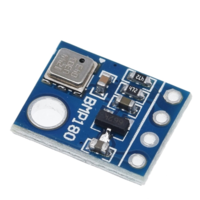
The GY-68 module, also known as the BMP180 module, is a popular sensor module used for measuring atmospheric pressure, temperature, and altitude. It features a highly precise digital barometric pressure sensor that can be easily integrated with an Arduino board. In this tutorial, we will guide you through the process of connecting the GY-68 module to an Arduino, enabling you to gather accurate environmental data for your projects. So, let's get started!